
Kubernetes is awesome. And Linode Kubernetes Engine (LKE) is also an awesome kubernetes service. It's versy simple to management and cost is very low. The lowest node which comes with 1 Core and 2 GB RAM is just $10/month. But by default, your services run on kubernetes are not accessible from public network. A normal solution is that you need configure a load balancer service on kubernetes. It will create a NodeBalancer on Linode which will cost you additional $10/month. Then the total cost will be increased to $20/month.
The node used in LKE is a normal Linode VM. Every Linode VM comes with a public ip which can be accessed from public network. So theoretically, you don't need an isolated load balancer. You can run Nginx as a load balancer on the node. Nginx can expose your services to public network. Then your minimal cost is still $10/month. This article will try to demonstrate this idea.
First, let's register an account on www.linode.com. I'll appreciate you if you can register with my referral code: cf7cfcc5ea862ef6452a0c5d1d85243a90c7fc73 😃. You can also search linode coupons on the internet. Sometimes you can get $100 credit for 60 days or $10 unexpired credit.
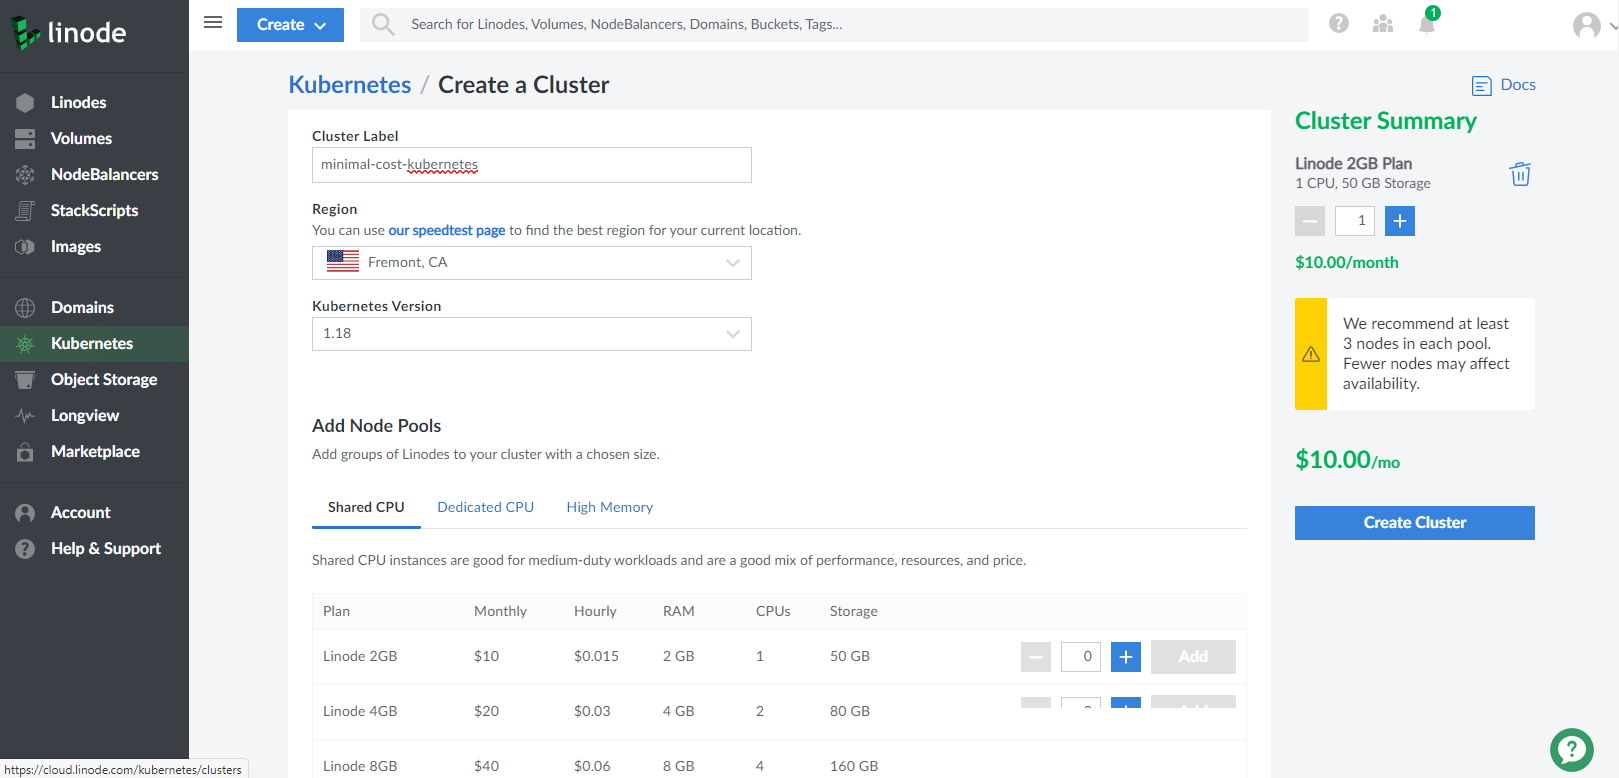
After login your account, select Kubernetes on the left navigation column, and select Crete a Cluster button on the top-right. You need
assign the Label, Region and Kubernetes Version to your cluster, and create a Node Pools. Let's just add one node in Linode 2GB plan. On
the right side, you can see the cost is $10/mo.
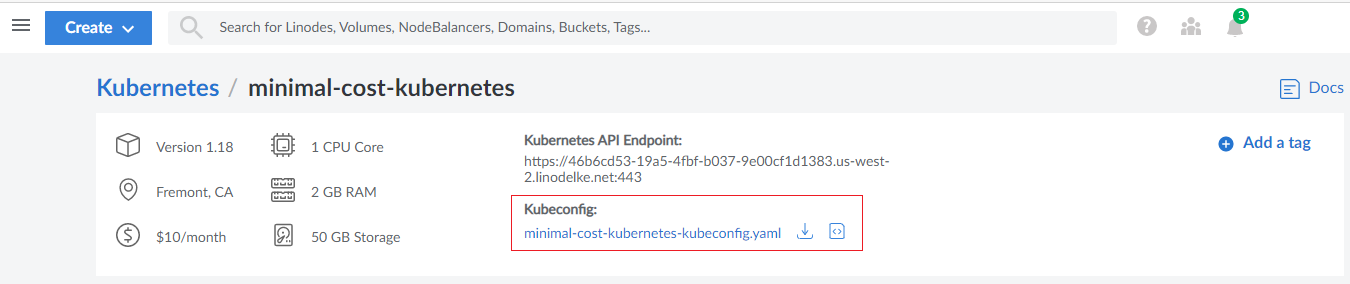
Once you click Create Cluster button, you will be navigated to Kubernetes management page. You will see your kubernetes cluster is under
provisioning. When it finishes you can download your Kubeconfig file. Later, you need this file to connect to your cluster.
We need login to the node to install our load balancer, so we need reset the root password of the node. Click Linodes on the left navigation
column, select the node just created by kubernetes, click Power Off. Then go to Settings tab to Reset Root Password:
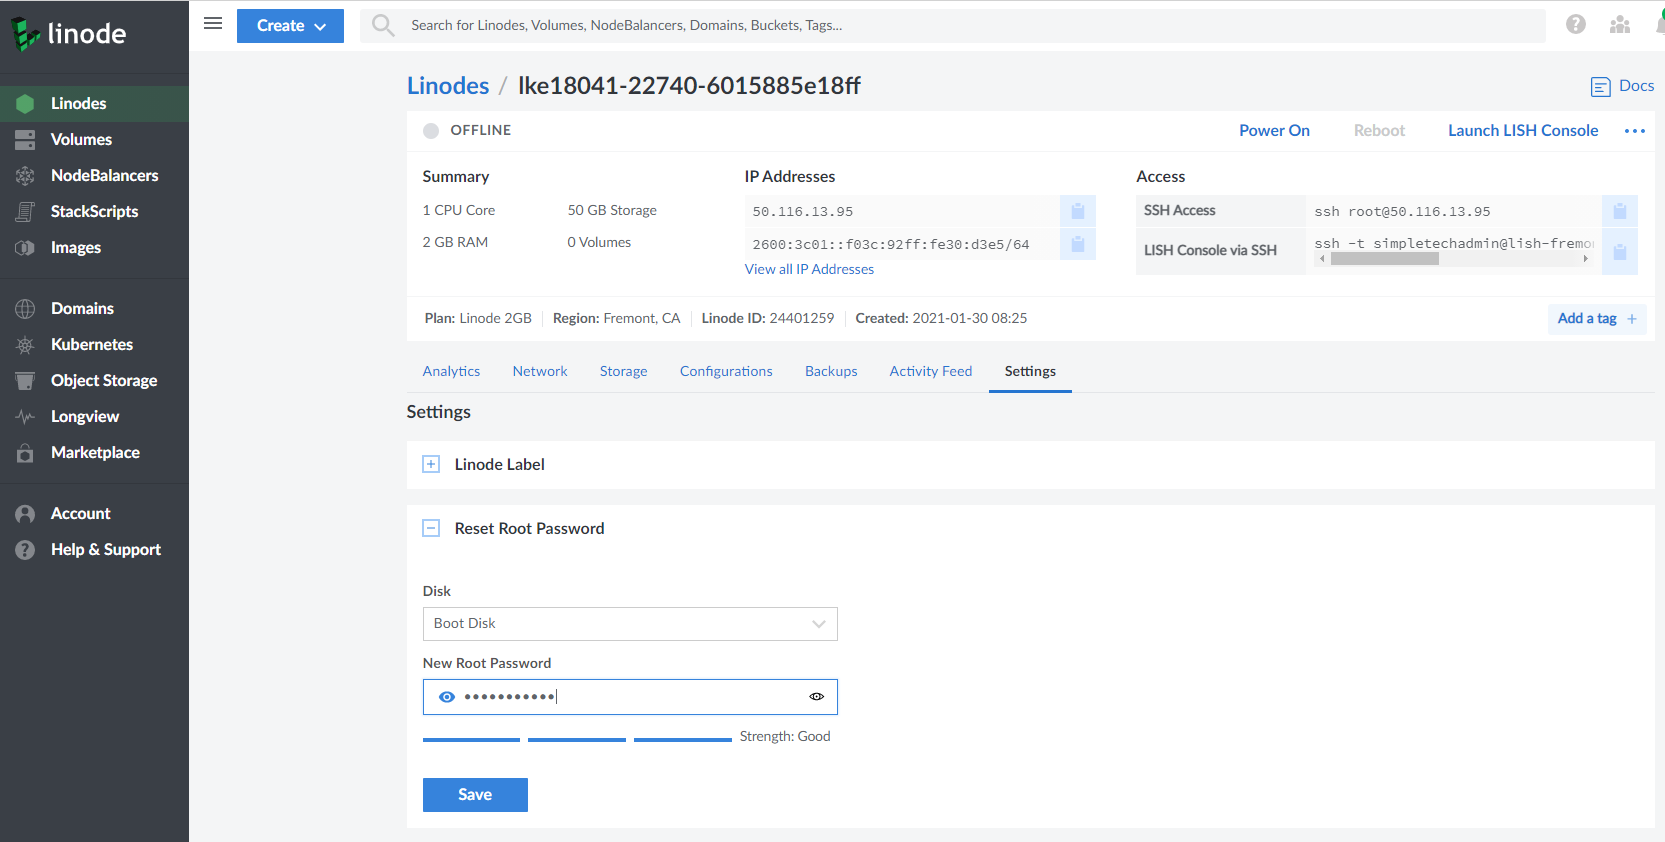
After that, click Power On to restart the node.
Now, let's install kubectl client. You can install it on different platforms. Here, we use Ubuntu:
curl -s https://packages.cloud.google.com/apt/doc/apt-key.gpg | sudo apt-key add -
echo "deb http://apt.kubernetes.io/ kubernetes-xenial main" >> ~/kubernetes.list
sudo mv ~/kubernetes.list /etc/apt/sources.list.d
sudo apt update
sudo apt install kubectl
Row the following commands:
export KUBECONFIG=~/minimal-cost-kubernetes-kubeconfig.yaml
kubectl get nodes -o wide
If you can see the similiar line, congratulations, your kubernetes cluster is ready to use.
NAME                          STATUS   ROLES    AGE   VERSION    INTERNAL-IP      EXTERNAL-IP    OS-IMAGE                       KERNEL-VERSION         CONTAINER-RUNTIME
lke18041-22740-6015885e18ff   Ready    <none>   17m   v1.18.15   192.168.215.40   50.116.13.95   Debian GNU/Linux 9 (stretch)   5.10.0-2-cloud-amd64   docker://18.9.9
If you see the STATUS is NotReady, most likely the restarting work is not finish. You can just wait for some seconds and try the command
again.
Now, lets create a service. Create a file ~/test-service.yaml with the following content:
apiVersion: apps/v1
kind: Deployment
metadata:
  name: test-service
  labels:
    app: test-service
spec:
  replicas: 1
  selector:
    matchLabels:
      app: test-service
  template:
    metadata:
      labels:
        app: test-service
  spec:
    containers:
    - name: test-service
      image: k8s.gcr.io/ningx:latest
      imagePullPolicy: Always
      ports:
      - containerPort: 80
Run kubectl apply -f ~/test-service.yaml, you should see this line in the output:
deployment.apps/test-service created
Run kubectl get pods -o wide, you should see:
NAME                            READY   STATUS             RESTARTS   AGE   IP         NODE                          NOMINATED NODE   READINESS GATES
test-service-6bf7656ff9-vb45s   0/1     ImagePullBackOff   0          6m    10.2.0.6   lke18041-22740-6015885e18ff   <none>           <none>
Now the service is running, but we can't access from the external. In order to expose the service to external, we need create
a NodePort service. NodePort service is a kubernetes service, it will expose a port on every node. When you send the
request to the ~/test-nodeport.yaml
with the following content:
apiVersion: v1
kind: Service
metadata:
  name: test-service-nodeport
spec:
  type: NodePort
  ports:
  - port: 8080
    targetPort: 80
    nodePort: 30000
  selector:
    app: test-service
Run kubectl apply -f ~/test-nodeport.yaml, you should see this line in the output:
service/test-service-nodeport created
Run kubectl get services -o wide, you should see
NAME                    TYPE        CLUSTER-IP      EXTERNAL-IP   PORT(S)          AGE   SELECTOR
kubernetes              ClusterIP   10.128.0.1      <none>        443/TCP          42m   <none>
test-service-nodeport   NodePort    10.128.96.160   <none>        8080:30000/TCP   99s   app=test-service
That means the nodeport service is running now.
Let's explain a little more about the three ports in the test-nodeport.yaml file. The port is the port of the cluster ip. It is an address
which can only be accessed inside the cluster. The targetPort is the port of the application runs inside the cluster. Normally, it is the
container port which is exposed. Like we specific containerPort: 80 in ~/test-service.yaml. The nodePort is the port exposed on every
node in the cluster. It is accessible via 50.116.13.95. So you can open your blowser from local to access the address: http://50.116.13.95:30000:
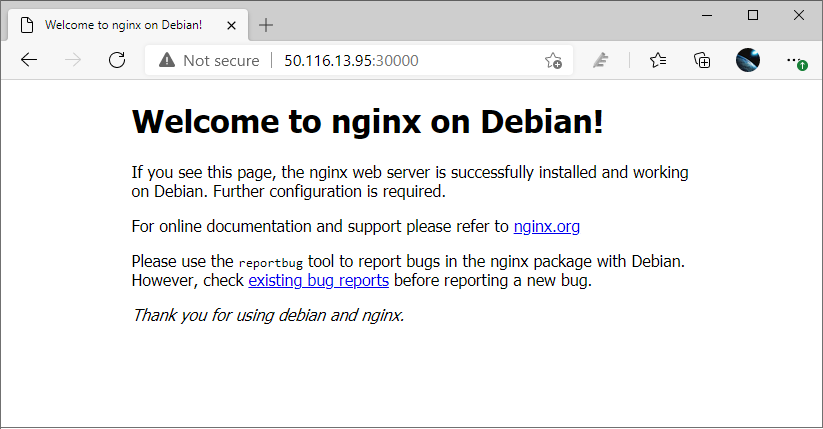
The request send to 50.116.13.95:30000 will be routed to
OK, your service can be accessed from the public network now. Then the only left thing is just login your node, install nginx and configre it as a load balancer or reverse proxy which forwards the request from http://50.116.13.95 to http://50.116.13.95:30000. There are a lot of examples about how to config nginx in the network, you can search it.